Wednesday, July 11, 2018

Early sails and galley.

I did my first trial launch this last winter. No mast, but given that I’d never launched with a trailer it was a great experience testing systems and motoring into Lake Union. 


Have since had many enjoyable sails - though have been hampered by not having a main (too long and sad of a story to tell, may resolve soon). Luckily, the wind is either north or south in Puget Sound, so we reach across with asymmetrical or screecher and use the jib when the wind picks up or need some more windward ability. 


Recent projects have included working on some galley ideas. A sink and stove module swing out from the starboard settee with a work counter in between. With the pop top hatch I think it will be a great addition as a micro cruiser. 


Here’s a video of a pleasant afternoon sail with asymmetrical this last spring:  https://vimeo.com/274191409

I’ve since finished modifications to the bow sprit that allow easy pivoting up for getting it out of the way or sail setup while underway. It uses a 3:1 bobstay on Colligo static blocks that is held by a light weight Ronstan Constrictor clutch attached to the base of pole. There’s also an end cap for mounting nav lights. 

Friday, November 25, 2016

November

I had a request for an update. 


Can't really remember why I stopped posting other than I was sporadic to start with and once you've fallen behind it's harder to catch up. Also, as I needed more space to get the halves together and paint etc., I moved the project  ~ 40 minutes away from home so time became a more significant issue. 


I'm back at home now, finishing the interior and hoping for next spring/summer splash. 


I had a great crew moving it back home. 


Last spring we took a couple weeks traveling down the coast to Southern California and picked up trailer and mast. 


Moved the boat to my daughters (2 hours away, so she hosted me for the weekends - pretty nice actually) for space to mount beams and floats. Then raised the mast and measured for sails. 


Then recently, seemingly taking some steps backwards, I removed the floats and brought it all home to return the main hull to my garage to finish the interior over the winter while sails and nets are constructed. 


I have to lift the boat off the trailer to get it inside. 


It's a tight fit. When I started the project I knew there were going to be issues with finding alternative workspaces and decided to start not knowing what would happen. It certainly slowed down the project to not be able to do everything close to home, but it's seemed to all all work out. Someday I'll plan on filling in the gap's to the story.

Wednesday, August 31, 2011

August

Lifting out the first main hull half -- a pretty exciting step (I've probably said this before, its one of the great things about seeing a project take shape).  After removing a couple thousand + screws I tried lifting.  It was loose in places, but it wasn't going to pop out.  I lifted with a come-along from the forward bulkhead, and leveraged along the outer centerboard case, pushed and pulled -- and then it popped!

I think the problem was from the few screws that had penetrated the foam and required removal and filling prior to the glassing (or the one that leaked and I had to take care of during the bagging with 5 minute epoxy).  These areas acted like an epoxy screw in the batten.  I'll plan on marking them from the outside next time while backing the screws out so I can take care of them individually prior to lifting.


Not being able to lift the hull very far I had to crawl along underneath to remove the screws.  Some areas behind the deck and near the keel were a real challenge.


I hadn't been planing on saving most of the battens, so it was an easy choice to start cutting them up when it became easier to do it that way.

Its quite the archeological dig under the forms.


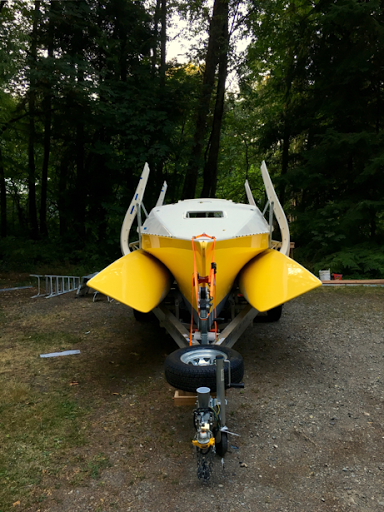
Somehow I think the outer hull is more impressive, even at this rough stage, than the interior.  It looks like a boat!


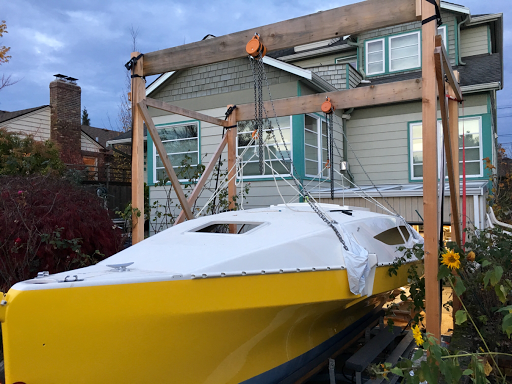
Its an easy two person lift by my brother and I when it comes to weight, but holding on and trying to turn it was a challenge, in more ways than one -- meaning we had a couple of false starts.  I measured from keel to cabin top and it appeared that I would be able to make the rotation -- No.

We discovered that the greatest distance was actually from the keel to the gunwale, more height than I had.  So I removed the garage door opener off the ceiling, knowing I was going to do that before I brought the boat back in after joining anyway (and I'd hit my head enough while crawling around that it was about time).


(Before removing it from the forms I had placed braces from deck to keel to add support as necessary.)


This time I recruited a few more people (thanks fellow Neighborhood Block Party participants!) and tried again.  With this many people everyone felt like they weren't doing anything.  But again, so close, but it wan't going to happen.


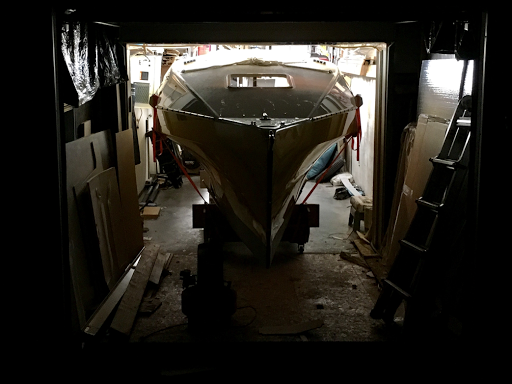
So we walked it out.


Turned it over . . .


and walked it back in.  Easy.

The only concern was placing the glue flange along the bunk and cockpit floor into a prepared groove to protect it during the next step.


We escaped for a short cruise.  Five days in the San Juans on my Dad's boat.  Amazing to be so close to something so great.


When we returned, I started back filling the seams where necessary and filling the screw holes.  Then it was shaping and fairing with the longboard.


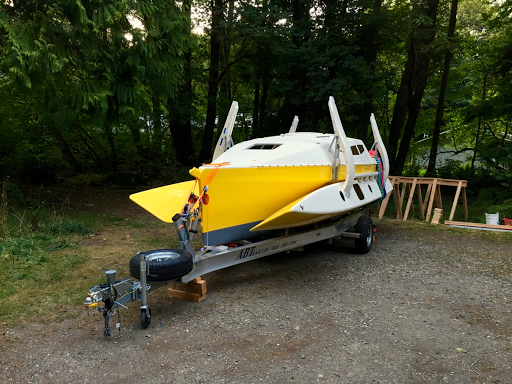
I raised the hull onto 2x4's to protect the flange and moved it over onto an outer support so I could see the centerboard in action.  I suppose we should call it a sideboard or a portboard. I think it looks great.


Here's how I relieved the hull slightly to fit the front part of the board.  Its really a testament to the design and engineering that went into the plans when you see how all the angles come together in the right place with the interior to exterior board transition and the curved hull.

Sunday, July 31, 2011

July

The next step, though straight forward, was one of those "think twice, cut once" moments -- cutting a large hole in the keel.


The foreword portion of the centerboard case is internal to the hull.  The aft portion extends through the hull.  It also extends aft of the cabin bulkhead.  It would be difficult to get the centerboard case in and out for fitting with the cabin bulkhead in place which is why I placed it later.  I had strategically placed the battens so that I would only have to remove a portion of one.


This is how the cut edge of the plank join looked. I think that cutting one side with the knife and filling with the Zip-Lock bags worked well.


Fitting the case to the inner hull was an exercise (pun intended) of lifting it in and out for multiple trial fits. It really is on the part of the hull side transitioning from flat to vertical.  I was very happy to have left out the cabin bulkhead.


This is the set-up I had to make leveling the case easy and repeatable.  A simple turn of the screws to raise or lower each corner.


Here the cabin bulkhead has been placed (bunk just sitting there).


One of the reasons I had built my centerboard early was to make sure it would fit in the case, and also to try and help decide where to make that transition to the open slot. In the end I left it so that I will fine tune the opening by removing a small amount of the hull foreword of the board, but all the load bearing edge of the case does extend through the opening.  I'm glad I angled the port edge of the board that remains in the case, as the fit against the sloped hull is tight.


I realized that I should make a glue flange along the hull for the settee since this would be easier now than taping it later through the as yet uncut access hatches.


After final placement.  The cockpit floor will rest on the extended end of the case with the control lines coming up through the floor between the cockpit seat and companionway.


Next I extended the glue flange for the bunk along the case, bulkhead, and hull.


Here's the final placement of the port bunk.


The aft beam bulkhead, angled as necessary.


And the necessary angle for the transom bulkhead.  I followed Meno's example here.


This gave me three positioning points for the cockpit floor, here getting its final trimming.


Placing was a two person job.


The dry fit is easy with two surfaces below and one above.  Once those are covered with putty its necessary to put a bend in the floor while placing -- not so easy.


With it just slipping into place, you can see the value of cutting the edge to match the hull shape.  Without doing this the join would require a significant volume of bog and be much heavier.  The plan measurements are for where it touches, so you have to leave this edge long to allow for scribing it to shape.


I also placed the aft end of the seat.  The forward face can't be placed till after joining, so it is just temporary here.  You can't see it in this picture, but the outer edge did not perfectly match the hull. (If I was cutting the bulkheads out again, I would cut the straight edges as directed, but leave the hull edges slightly long.  It's so easy to scribe and cut exact if you have left the necessary material.)  With the larger bulkheads I support them across the hull so that they will be exactly midline.  What I did here was to put the necessary size shim at each end and made up the difference with bog.  Then after the material had cured, I removed the shims and filled the gap with bog.