No building. Soon.
We took a trip to Israel and then Santa Barbara to visit my daughter - but I'm refraining from turning this into a travel-log.
Thursday, December 31, 2009
Saturday, October 31, 2009
October
No, I'm not building yet . . instead I'll post some pictures I took on my fall trip the last part of September and early October. I drove to Colorado for the fall colors via Oregon and Utah, then drove the high plateau of Utah before dashing home. Just over 4000 miles. No Farrier sightings, I'm afraid.
I stopped in central Oregon to see the Painted Hills (ash deposits from extinct volcanos). The area also has many fossils, like banana plants and early horses, camels, and rhinoceroses.

I also explored the tallest single-structured sand dune in North America in the high desert of eastern Oregon -- Bruneau Dunes.

From there, I drove straight to the Canyon Lands of Utah, Dead Horse State Park. This is where the Colorado and Green Rivers come together, going from here down through the Grand Canyon to the Gulf of Mexico.

I met my friend Robert and his wife here, and we spent a week in Colorado. First stop: Maroon Bells. Colorado likes its 'Fourteeners' and these two are over 14,000 feet.

We drove miles of dirt road through beautiful parts of the Rockies. These are the San Jaun Mountains – more fourteeners. The color of the changing Aspen was fantastic.


Mt. Wilson (fourteener) near Telluride.

My friend Robert has a Jeep, so we went on some great 4x4 adventures. Here Ophir pass gets us above the tree line and tops out around 13,000 feet.

Last stop in Colorado was Mesa Verde, an area of cliff dwellings made in the 12th century by the Anasazi, ancient Pueblo people.

From here I left Robert to head to Utah. I looped up through the southern Canyon Lands.
Natural Bridges National Monument.

Classic South Western scenes. The Colorado Plateau (found in four states, here Utah) at times was covered by warm seas and at other times lifted by faulting and exposed to tremendous erosion - the layers extend from nearly 2 billion years ago to the present.


The high areas are now at 9,000+ elevations. I drove south across Capital Reef, a 'water pocket fold' 100 miles long . . .


. . . to Bryce Canyon's amazing hoodoos.

My last stop before heading home was three days hiking in Zion National Park, where you camp in a valley surrounded by 2000 foot cliffs.


The hiking was fantastic, though the start was always up.

My highlight hike was Angel's Landing. The narrow trail along a rock fin drops 1200 feet on one side and 900 on the other.

The massive canyon walls make for quite a backdrop.

It was a bit long to be away from the family, but the sights were amazing.
Wednesday, September 30, 2009
September
No building. But some thinking.
I had originally planned on building the standard / aft cabin. In fact I've already built all the flat vacuum-bagged parts specific for the cockpit, aft cabin, bunk, transom.
I based my original decision on thinking that I would maximize interior space. And our family is used to an enclosed cockpit with seat backs. I remember describing an open transom -- "Why?" and "No!" were the responses.
I have visited Jay's aft cabin and like the interior space, and the family would like the 'enclosed' feel of the cockpit. But, at this stage I've decided to concede that I will be using the boat mostly for day sails and that I would enjoy sailing more with a larger cockpit. The standard cabin will be ample for the week or two of cruising in the summer.
Monday, August 31, 2009
August
After returning from Alaska I decided to take the rest of the summer and most of the fall off from building. We have been breaking records of dry and heat – I haven't wanted to miss out on life's other opportunities.
Friday, July 31, 2009
July
How do you pick 15 pictures out of several thousand? You finally give up on finding the 'right' ones and be done with it. Following are some pictures of our Alaska trip.
(I think it was Grant who first posted a picture from near his home and suggested others do likewise. I've expanded the idea to include some local trips in the Northwest. If you look at these, you'll see two Farrier-related ones!)
We spent 3 days going up the Inside Passage through British Columbia, Canada, and then Southeast Alaska.

Although we had a stateroom, the ferry is unique because they encourage tenting on deck! My F-22 cap helped me meet several F-boat sailers (both from California).

After debarking in southern Alaska, you have to enter Canada again to drive around Wrangell - St. Elias National Park (which contains 9 of the 16 highest peaks in US, and the largest North American non polar ice cap). The Yukon had its own unique beauty.

Valdez (the end of the Trans-Alaska pipeline) is a harbor surrounded by mountains.

We took another ferry across Prince William Sound.

We debarked at Whittier on the Kenai Peninsula. There I meet Sean, an avid F-boat sailor. It was enjoyable to talk as his family launched prior to a several day cruise. He knew of one other F-boat in Prince William Sound (Valdez).


When I had been researching this trip I investigated a glacier hike out of Seward. One of the links was to a Flicker site with pictures of a man hiking with his sons. But slipped in at the end was a picture of a boat project . . . and I knew what they were - F-22 floats! We e-mailed several times, agreeing to meet if possible. I enjoyed an afternoon talking with Dan (also of note -- a previous F-24 owner) about Alaska, sailing and boat building. (I also gave him Sean's e-mail and know they have been in touch.) Small world.

The van worked great. Before we left I fitted a bug screen that goes around the awning. This gave us room for four people to spread out. The long days were incredible.

Wildlife beyond counting.


Denali National Park was a highlight. Denali (Mt. McKinley) is 20,320 feet tall - with a prominence of over 18,000 feet, which makes it look as big as it really is. Less than a third of visitors see it because it makes its own weather. We saw it one afternoon of three days that we were there.


After Fairbanks, we started down the Alaska Highway. It's 1422 miles long, constructed between March 8, 1942 and October 28, 1942 by over 18,000 people as a military supply route during WWII. Over 8,000 planes, thousands of tanks and trucks, were all hauled up this route and flown into Russia to support the war in Europe.
The drive through Canada was spectacular.


A fantastic trip.
Tuesday, June 30, 2009
June
I just had a week in June to work on the boat before I had to change gears and get the van ready for a trip (Alaska).
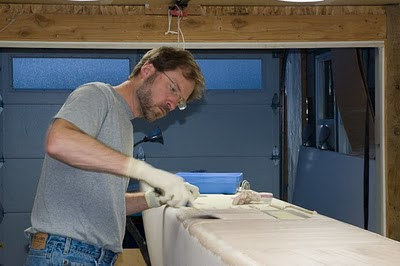
The rudder web was finished. Given the forces it must endure, it's a multi-layer-up affair suitable for short stints after work each night.

Also, June marked an exciting event: the delivery of the beams! This is obviously well before I need them, but I have been spreading out the cash outlay.
Truth be told, it cost more to get them here than I thought. I ordered them Oct 31 with the understanding that there was no rush. They shipped April 14th (~$500) and arrived in Los Angles May 18th (~$165 to get them off the dock and into a truck to come up the coast) and then I was able to pick them up at a Seattle customs clearing area on June 4th (~$485 fees and duty). Whew.
Given the boot prints all over the box, I was glad for the excellent packaging.

And, of course, they look very svelte and wonderfully constructed.

I took another item that I had received months ago out of its box - the beam mounts. Since I ordered them early, I got the 'original' - they have since been modified in terms of how they are installed.
The originals require replicating the bolting flange onto the other side. I used the 'alternate' beam mount as a mold to make the 'mold', then bolted it onto its symmetric partner.

Then there's quite the lay-up schedule of UD and DB.

That was it for the month. One daughter was home from college and we picked up our other daughter on the last day of school, heading directly to Bellingham to catch the evening sailing of the Alaska Ferry.
Sunday, May 31, 2009
May
After that initial sand, I still had some problems with several low areas: around the attachment of the foam bow, and the transition of more round/full keel towards the sharper entry area. I decided a skim coat would be easiest. I also spot-filled some bubbles.
(This is an area that has been problematic in varying degrees on all four float sides, and I've seen others comment also. I have two ideas. The reflection of extra glass at the bow entry leaves a low spot behind, and I've been too aggressive at sanding down the stripes in this transition area from full/round to flat/vertical. Or the root problem may also be how the forward end of the float is constructed. The battens near the keel make a difficult twist in a compound curve as they approach form #1 - this may make this area shallow. A more careful investigation when attaching the foam cap and fairing the foam could alleviate this problem.)

I have a constant supply of used, but clean syringes from work. I cut off the Luer-lock to make a fine point, use a couple of reusable ergonomic modifications to save my hands, and fill them with a Ziploc bag. With these I can fill the small Dremel bur depressions left from attacking the bubbles with minimal effort or material.

I did the deck in a similar fashion as the first float. First I put on a single skim coat, working the material with significant force to work out any bubbles. I'll admit this is more successful than on the sides with the candy stripes.

I modified my sanding by trying the 'cheese grating' technique described by Wayne Hicks. Essentially you begin sanding while it's still soft - when it deforms with a thumb nail, but isn't tacky.
The idea is different enough that I was sure it wouldn't work . . . but it does.
Shortly after I finished applying the QuickFair I was able to begin sanding with 36 grit (at the bow where I had started) and slowly worked towards the stern while it continued to cure. The material came off in soft clumps that did not clog the sandpaper and were easily brushed off. Interestingly, the heat of the sanding seemed to speed the cure as I moved along. It was a great time saver to remove the majority of excess QF - and there was no dust! Unfortunately, I can't see how I could incorporate this technique to larger curved areas, as I couldn't apply it fast enough with the short cure time of QF.

Nearly finished except small detail areas.

After working with the soft QF during the 'cheese grating' I tried several other variations on this idea. One was obvious - cut off the tops of any filled Dremel divots with a wide chisel. This negated any effort trying to sand them without lowering my finished QF level.
I also found a couple of areas that were low from the edge of the trowel during the skim coat of the deck. Attempts to fill this type of area before had either left it low by trying to minimize the amount, or required extra effort to sand down without hurting the surrounding material. To fill these high, I put tape around the defect and skimmed over the top. This left the QF patch elevated by the uniform thickness of the tape. When strong enough to not tear, but soft enough to cut, I used a chisel and easily removed the excess.

Both these techniques took care of the last minute touch-ups before I began the final sanding to get it to that 'thin as possible' state.
I used the same skim coat followed by two coats of raw epoxy as required to seal the QF.
I have been working hard to get the floats to a stopping point before June. So, though they have a ways to go, this is how they'll sit.

Between steps I also continued to work on smaller parts. Here are the gudgeons as made in the mold.

My previous experience of vacuuming after wrapping carbon around an edge had not been perfect. As the excess resin is removed and as the fibers are compressed, they are not pulled tighter around the edge, but instead make a small wave or wrinkle. I decided to do a hand lay-up and let gravity pull the peel ply over the carbon. I've also found that making the part slightly larger and cutting to size makes the finished carbon uniformly thick out to the edges.

Gudgeons being fitted on rudder web.


Subscribe to:
Posts (Atom)
