Friday, December 31, 2010
Tuesday, November 30, 2010
November
No Building this month.

We had fun with all the children.


On the way home we went to Kenya and enjoyed the Masi Mara.


My wife is on the board of a nonprofit called Sister Connection, which supports Burundian widows and orphans. A decade of war has left thousands in need, and Sister Connection strives to help meet the basic daily needs of food, shelter, medical care, clothing, and education for many 'widows and orphans.
We took our youngest daughter and toured the activities of Sister Connection in Burundi. It's amazing the difference that can be made when people help people. It was also encouraging to see improvements in safety and economic development since the time my wife and I went to Rwanda and Burundi 10 years ago and helped at two hospitals.
Meeting a girl whom we have supported for ten years (through another organization) was an emotional experience. We felt we knew each other from shared pictures and stories over the years.

We had fun with all the children.


On the way home we went to Kenya and enjoyed the Masi Mara.


Sunday, October 31, 2010
October
Building came to a stop, likely not to resume until winter. We finished my Dad's boat - true to all projects it took longer and cost more . . .
My brother Toby and I took a fall hike in the North Cascades a couple of hours north of Seattle as a last hurrah of fall. Cold, sunny, and amazing views. A couple of days latter this trail closed until next summer with the first blizzard.

My brother Toby and I took a fall hike in the North Cascades a couple of hours north of Seattle as a last hurrah of fall. Cold, sunny, and amazing views. A couple of days latter this trail closed until next summer with the first blizzard.


The other project that I worked on was the idea of printing my blog.
I first experimented with temporarily changing the template to one that was printer-friendly and just using my own printer. An ok option.
The other option for a print friendly template would be Bookemon. I'm sure there are others in this category. You have to save sections as .pdfs and then combine them. The nice thing is that with a little effort you can get a bound book.
Then I found Blog2Print. It sucks in your blog (or interestingly, anyone else's) and spits out a book. You don't really have any control, but it's easy and fast, and you get a bound copy in the mail for not too much money.
The high end is probably something like Blurb. While it can suck in all the text and pictures, it definitely needs some work after that. I found that I needed to upload higher resolution pictures and spend quite a bit of time making new templates. But you do have exacting control if you want to spend the time, which for a combination of text and pictures can give you 'professional' looking results.
Thursday, September 30, 2010
September
I'm still spending my weekends up helping my Dad on his boat, but I've continued to push ahead on free evenings after work.
I started placing the battens with the thought, "I'm going to use fewer than I did on the floats." But it didn't work out that way. Bending over convex shapes seems to beg for more to smooth things out -- too few and the transition is too sharp. Sucking the foam into a concave shape, especially when it may not have been thermoformed completely requires some holding power -- and a couple extra battens spreads this out. Where do you stop? I think I used more than necessary once again.
I'm planning on vacuum-bagging this time (the surface is too tall and far to reach it easily for the 'poor man's' technique I used on the floats) so I added an extra batten along the top to extend the foam for sealant tape attachment. I also thought about the placement of the battens in relationship to where I will be installing the centerboard case. As noted by others, the gunwale section forward of the forward beam mount are straight and therefore discontinuous with the aft battens.
With the complicated shape I spent more time trying to make sure the resulting surface was fair. A lot is happening with compound bends and twists to the battens in some areas. It's amazing how one batten will be more stiff than those next to it, or have to start twisting in a new direction -- and this will make it stand higher or lower than it should. In several areas I attached very thin, flexible, strips under the battens (parallel to the forms) which smoothed these areas out (picture later). It's possible that placing the foam does something similar, but I wanted to do everything I could.
Also, since the battens extend unsupported past form #1 (and they don't all want to do the same thing), I added extra support to position them how I though they should be.

At one point I remember seeing a wrist band with magnets that held fasteners at the ready. A magnet in the pocket allowed the screws to be handy when stooping (crawling?) underneath. My version below:

When doing the floats I tried to thermoform the foam and place it such that there was no tension on the battens. The soft (cheap) batten material I was using could be pulled out of shape if the foam was just forced into place and held with screws. I started with the same plan for the main hull, but I found that several factors made this more difficult to achieve.


The screws that I've been using don't really penetrate the foam very far. In some places I found myself expecting them to hold better than they could, so I went to longer screws that I held back with washers because the next size up was too long. Of course, now I found some tips that were just penetrating the surface (which won't do for VB'ing). I circled these and then replaced close by, with the hole enlarged and later filled.
I plan on joining the strips of foam by placing bog between them - just like I did on the floats. Because of the size and gentle curve on the floats, I was able to place a shallow bevel with a router table and a dovetail bit after thermoforming (thermoforming after this step puts a cusp on the edge). These strips have too big a curve to do this effectively. Most builders use a Dremel tool to place this groove after attaching, which is likely what I'll do.
My previous experience was that the foam strips which weren't quite together allowed a small amount of material to push through - which was easily removed when fairing the exterior foam prior to glassing. On the other hand, those strips which butted close together were 'dry' on the exterior. I had to open and backfill some of these before glassing. This time I'm using small shims between the strips to keep them slightly open and to encourage the gap to be filled all the way through. It's possible that with vacuum bagging (vs. hand lay-up) the exterior, any dry areas between the foam would be filled with epoxy, and therefore not require backfilling. I'll evaluate this when I get to that step.
Otherwise not much new. Thermoform, scribe, cut to shape, trace edge onto battens. Place packing tape, drill holes, pre-place screws from under side. (Behind the tape you can see the 'equalizing' strip attached underneath).

Then screw in place . . .

. . . and if you're lucky, someone will be happy to help.

Tuesday, August 31, 2010
August
August didn't include as much work on the boat as I had originally planned. Shortly after coming back from our sailing vacation, my dad decided to take his boat out of the water and do a much-needed paint job. This turned into taking half the windows out to patch areas in the cabin sides, removing all the paint from the topsides and putting on an epoxy base before painting . . . and more. Suffice it to say that I spent all my weekends up in La Conner helping him. Not sure how long it will take, but he and my brother Toby are working on it full time.
I decided that I would work on finishing the second float outside in the backyard. That allowed me to be outside after work if there was time before it got dark, and in the garage after it got dark. I wanted to free up the garage to finish the last projects before I begin setting up the main hull form frames.
After making the same modification to the second rail, I secured the feet, placed the extra tape, and faired this area of the deck. I had only ordered one deck hatch so I could confirm that I liked it. Now the second one is on back order, so I'll just cover up the float as the rains will be here soon.

In the garage I began to put the centerboard case together. It requires a baffle. Having made the centerboard, I knew exactly what dimension I wanted so I constructed a simple mold. The inside corners are filleted before placing the glass.

Then I vacuum-bagged it. My original plan of using a cheap bag didn't work, so I slipped it in the same surfboard bag I used for the centerboard and rudder.

Attaching the baffle to one side of the centerboard case.

I decided to paint the interior of the centerboard case with bottom paint before I put it together. You can find many different opinions on the web about this step - essentially everything from doing nothing, to soft or hard anti-fouling, to copper-epoxy. And of course some paints are not designed to be out of the water or they lose their effectiveness. Also, once you start with one type, many require complete removal if you decide to change to another type. I asked Ian about this and he suggested a hard anti-fouling below the water line.
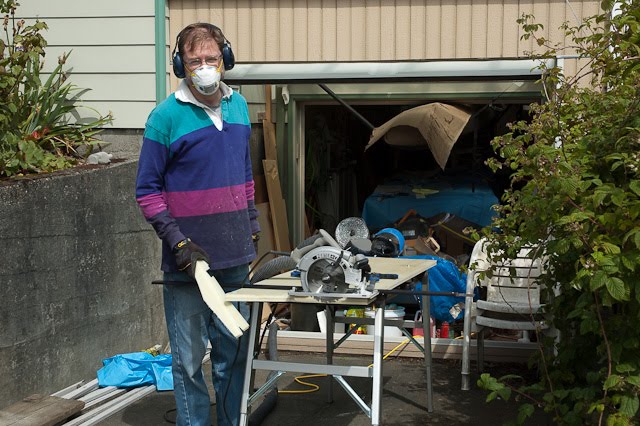
Where the inner flange is attached to the case, there's extra glass. To accommodate this thickness, I used to the table saw to make this end of the baffle slightly thinner.
Where the inner flange is attached to the case, there's extra glass. To accommodate this thickness, I used to the table saw to make this end of the baffle slightly thinner.

I like the bright colors that Pettit Vivid anti-fouling offers and it met the other criteria.
Toxic though.

Poor picture, but shows my plan for attaching the two halves. I also left unpainted the area at the top where more reinforcements go, and the bottom where it will be trimmed and attached to the hull.

I started to finish cutting out all the remaining flat parts. An interesting side note about tools: I purchased a jig saw at the beginning of the project (replacing one that seemed suspect). It was 'entry level' but looked like it would do the job. And it had a LASER! (Not useful.) Well, some time ago I lost faith in its ability, so I did everything I could to chose an alternate tool. After a particularly frustrating time on one part, I'd had enough. A little research online and I found that everyone who commented on my particular saw said that after some use it would become uncontrollable! After looking at several different saws (unfortunately, over twice the price) and reading the comments -- people talking about liking theirs so much that they would use it for jobs I would never consider -- I knew I had to throw this one out and buy yet another one. Wow, works like a charm. Yet again, I'm learning that you spend less getting the right tool from the beginning, even when it's more expensive. I also found a different brand diamond grit blade that is narrower, but cuts smooth and lasts a long time.

My last step while having a large flat work space was making the gluing flange on the forward bunk and cockpit floor. I used some 3M adhesive spray along the peel ply on the side I didn't want the flange attached to. This allowed me to attach a smooth layer of release film and then peel ply over this. I took the peel ply off the side with the planned flange attachment and clamped the pieces together. Then I used the poor man's vacuum technique.
Here's the final, untrimmed glue flange. I found that, even with the layer of release film, it paid to separate them early, while it's still slightly green. With the peel ply removed from the flange, it's ready to use.

Wow, I cut nearly all the main hull form frames what seems like a million years ago (as in during the first month of this project). I had saved #1 and #2 to be cut out of one of my vacuum table tops. I'll save the other table for making the few remaining interior panels.

I checked the strong back for level, re-glued a couple legs that had worked free from the floor while fairing the floats, and started aligning the forms.

What a great shape! I actually positioned the rotating laser level vertically so that I could check the centerline at the hull shape, as well as at the bottom of the form against my center string. (You can see that I haven't yet modified the forms back in the cockpit from my original plan of doing the aft cabin version.)

Saturday, July 31, 2010
July
I have the luxury of building slowly, partly because my parents have always been gracious to let me borrow their boat. I think of it as the Memory Maker (if there's a reason to keep a log, it's to read/remember all the past times together as a family -- the Trice has been making memories for 43 years!) We love our chance to re-experience our local cruising areas in the San Juan Islands and if time allows, the Canadian Gulf Islands.

My brother Toby joined us this trip. He bought a Nimble 24 on Chesapeake Bay several years ago. He used its shallow draft and trailer to explore great places of history and great cruising grounds on the East Coast. This year he finished the spring season with 6 weeks in the Bahamas. After a two-week trailering trip across the US, he launched at my parent's the day before we left -- and joined us. (He has had many experiences that only a shallow draft and trailerable boat can access -- aspects that originally attracted me to the F-22.)
This cruise was marked by many great sails (some years, summer can be a better cruising time then sailing time, but not this year). It was fun to have another boat to sail with and rendezvous with at harbor.


We picked up my brother Jeremy and his family from the ferry terminal at Friday Harbor. They joined us for 3 days. It's great to share time and experiences together at some of our favorite places.

Teaching my nephew to row.

The Bald Eagle population has recovered and is now a frequent sighting, though not often this close.


Having two boats meant that Toby and I could take an afternoon or evening sail as easily as a row to shore. It was fun to sail together (should I admit that it was my first time sailing on a monohull?).

Nothin' like cruising'!

When we returned I decided to tackle a small problem that I had been ignoring since last month. While lowering my float from being suspended in the garage, the bow slipped out of its web holder and fell about 2 1/2 feet, landing on the sharp corner of one of the 3/4 inch MDF frames that was waiting to receive it. The frame actually broke in the center where it was narrow -- I was afraid to look at the float.
The impact was on the outer side, right at the forward beam bulkhead. There was a circular crack in the fairing material and epoxy coating. It was also indented where the foam was compressed. I suspect that the bulkhead may have minimized the extent of the injury.
Here I've sanded the shiny epoxy coating with a longboard to show the area that was effected beyond the circular crack. Interestingly, the point of impact at the center of the circle showed no damage.

I removed the shallow fairing material and found a white circle in the glass, suggesting a disruption of the fibers. Ian agreed that it was not a structural issue, but said it may show as a cosmetic problem sometime in the future if all I did was re-fair this area. So, I put on a lightweight (~3 oz) glass patch under VB, hoping for the thinest fix possible.

I was lucky that this happened to be an area where the existing fairing material was just thick enough to allow me to place this thin patch without extensive re-fairing. This is my fairing patch placed with a couple layers of tape around the edge. A couple passes of the longboard show the usual low spot in the center of any filled area. The high overfill allowed a single sanding session make the problem disappear from sight.
I'll be more careful next time.

I started working on the inner supports for the wingnet rail. I came to two conclusions. One, I didn't want to have to fair the 'feet' where the rails attach to the float. Two, I decided to make them slightly beefier.
I started with a piece of the cutout from the rail itself. While in place, I added an upper lip under the rail, and after a some filleting material, a lower extension that conforms to the deck edge.

Originally, I had envisioned finishing it with a hand lay-up, but the lower extension was flexible, so needed to be done in place. And it was hard imagine working under the rail without making a mess. So I VB'd the part in place. Because the rail and deck edge are not parallel, the two pieces are not interchangeable. After cure, I released them from the packing tape on the deck edge and slipped out the ends for further shaping before epoxying them in place.

An exciting step -- holes for the deck openings.


I had previously purchased some reinforced plastic hatches. It was difficult to find any information about anyone's experiences with similar products. In the end I decided that they looked more like cockpit storage hatches than deck hatches. After looking some more, I settled on a Vetus hatch. More weight, more money, but designed for the job.

This was my first chance to get a look at the interior. I was most curious about the deck-to-flange attachment. I didn't enjoy doing this 'blind' -- was there enough adhesive, was there too much, did it ooze out all over the inside? In the end it looks like it was OK.


Wednesday, June 30, 2010
June
When the centerboard came out of the bag, each side was covered in a single layer of 45/45 and the layers of UD. Along the trailing edge, the layers meet on the solid epoxy that I originally placed in the routed groove before shaping.
Along the leading edge, the carbon layers meet but do not overlap since I did each side separately. This means that I needed to wrap the leading edge with a layer of tape to tie these together before placing the final layer in one continuous piece. (I had rebated the foam in the area to accept this tape.) I VB'd this by taping to the central part of the CB where peel ply still remains. This gave a good result, given the many different profiles along the edge. The reason I didn't use the large bag was to try to avoid a 'wrinkle' along the edge. By putting the VB tape on the bag material, I was able to apply it with tension along the leading edge even before starting the vacuum.
(Hope this makes sense. See my effort at making the chainplates for a little more description. Likely less of a potential problem this time because there's only a single layer.)

I like the look of the carbon! (I forgot to mention that I put a narrow piece of Kevlar down the leading edge of both the rudder and CB. I'm not sure what's best, but I wanted to help the impact resistance to this leading edge.)

It was a little bit of a panic to wrap the whole board in a single piece of wet DB, then put on disposables, then get it in the bag. But it happened, and the result was good.
I pre-cut a little large, then wet the carbon out on plastic (with clear, you can see it has wet all the way through), wet the board, and draped it over while still on the plastic (pre-drawing a center line on the plastic allows you to align the leading edge before really setting it down). Then all the other layers were started while it was still upright.
Once it's covered up to the breather layer, it can easily be moved around without disturbing anything. With it laying on either side, you can open up the package enough to make sure everything is perfect, then slid it in the bag.

The two halves of the CB case were still bolted together, so it was easy to cut them exactly the same. I started cutting out all the other flat parts as well. A circular saw with rail guide along a straight edge for the straight parts, jig saw for the curved. Bosch has a nice narrow diamond blade (designed for tiles) which works great on the fiberglass.
Making the edge for the centerboard case.

And cutting the edge to height -- since the inner edge has some variability from the tape, I calculated the correct dimension from the table and used the sander on an appropriately-sized block as described by others.

Lines up nicely.

Checking for appropriate clearances with the actual CB.

I switched back to working on the floats. It seems like it's been a long time -- I guess it has. Interestingly, while I'd been postponing putting on the wingnet rails for no particular reason, a builder's update came out with a couple of changes. I was able to accommodate these without any problems.
I researched the bolt rope attachment along the wingnet rail. I like the Sunrise Yatch site (and they will email you costs for F-22s). This quote is important: "There are thin wall aluminum awning tracks and plastic tracks available that will not work for nets, as they are not strong enough and will open up under tension." They have an extruded product that will work, and I printed the full size profile.
Given the changes in height and angles, and knowing the size of the bolt rope extrusion, I likely would have made the rail differently, but it should work fine.

One of the changes called for lowering the rail, so my recesses in the deck helped in this regard. After appropriate positioning, I epoxied it in place, added the taped reinforcing, and finished fairing the deck.

Subscribe to:
Posts (Atom)
